0%

hexo操作

  • 安装hexo:
    • npm install -g hexo-cli
    • hexo init myBlog
    • 生成文件目录
      1
      2
      3
      4
      5
      6
      7
      8
        .
      ├── _config.yml # 网站的配置信息,您可以在此配置大部分的参数。
      ├── package.json
      ├── scaffolds # 模版文件夹
      ├── source # 资源文件夹,除 _posts 文件,其他以下划线_开头的文件或者文件夹不会被编译打包到public文件夹
      | ├── _drafts # 草稿文件
      | └── _posts # 文章Markdowm文件
      └── themes # 主题文件夹
    • 本地预览:hexo s

github操作

  • 创建仓库

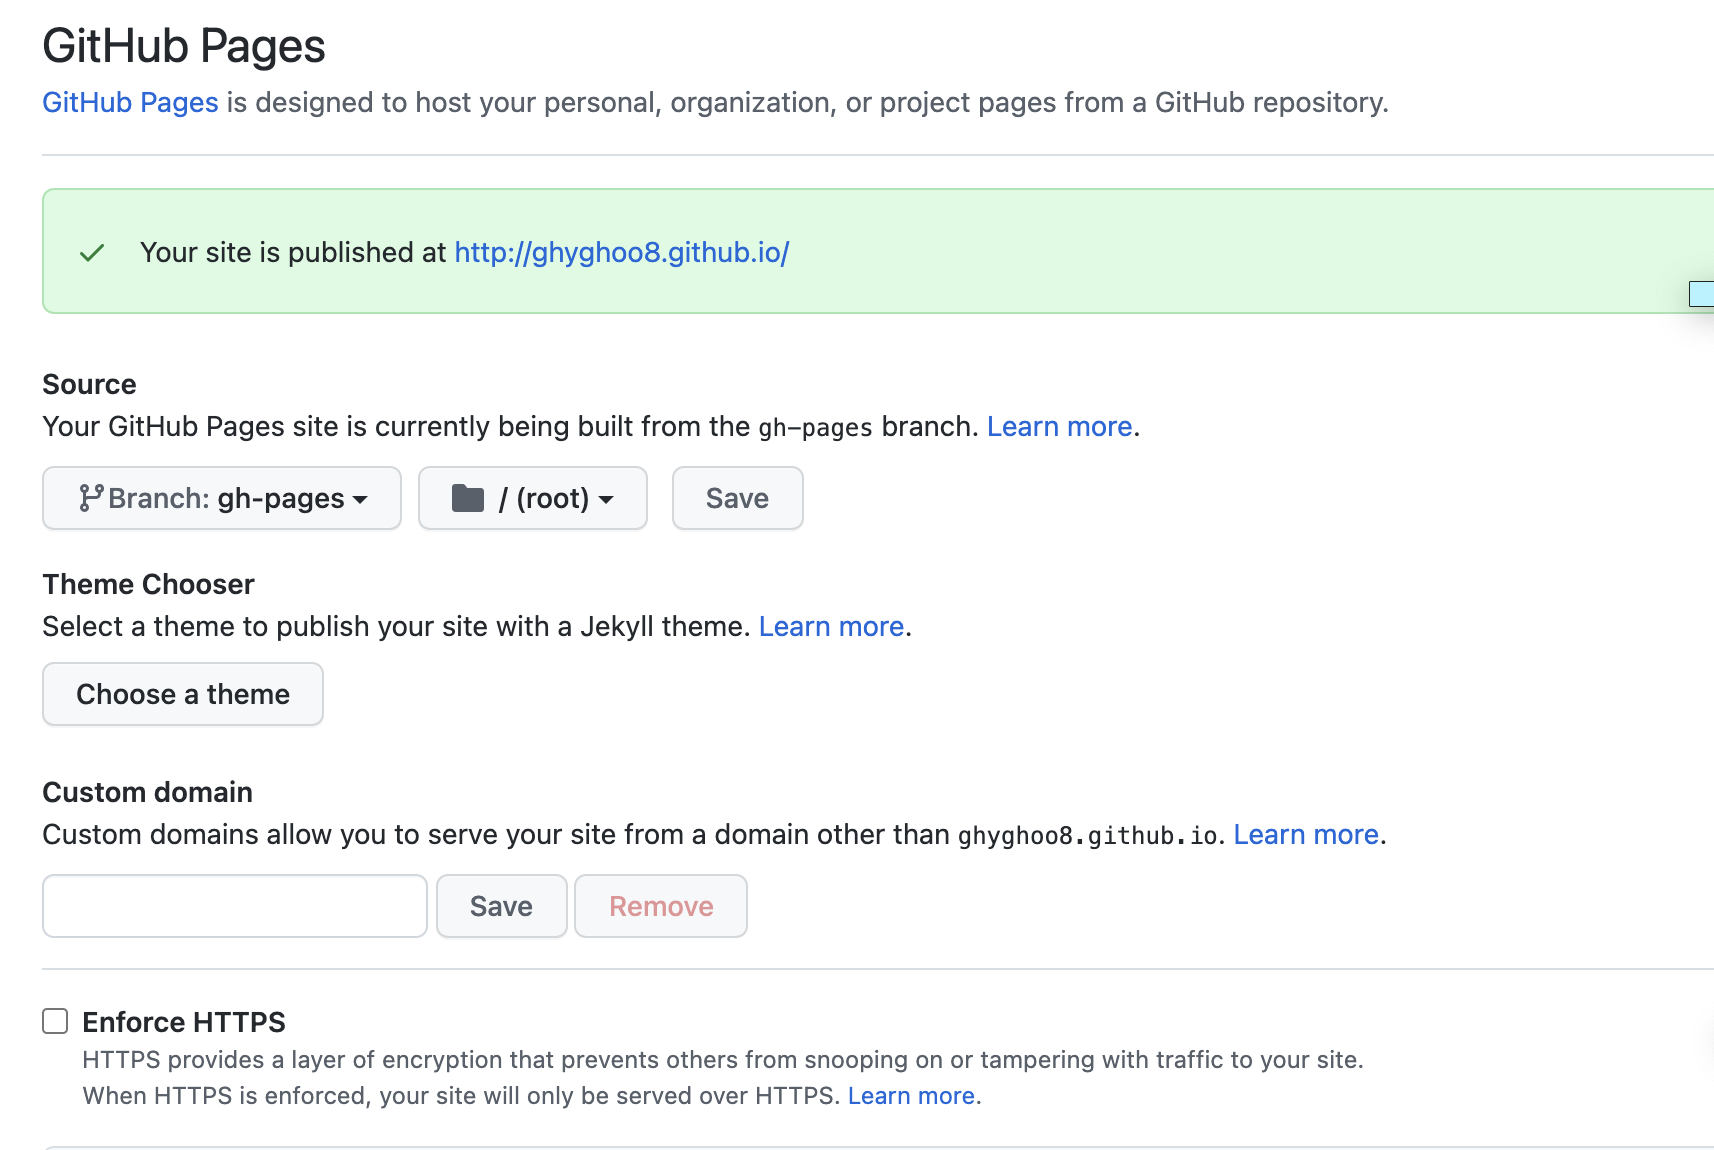
  • 将该仓库设置为静态站点托管。

    • 点击仓库菜单Settings->Pages
    • 注意:Github 仅能使用一个同名仓库的代码托管一个静态站点
      logo
  • 在页面https://github.com/settings/tokens创建 Personal access tokens
    token

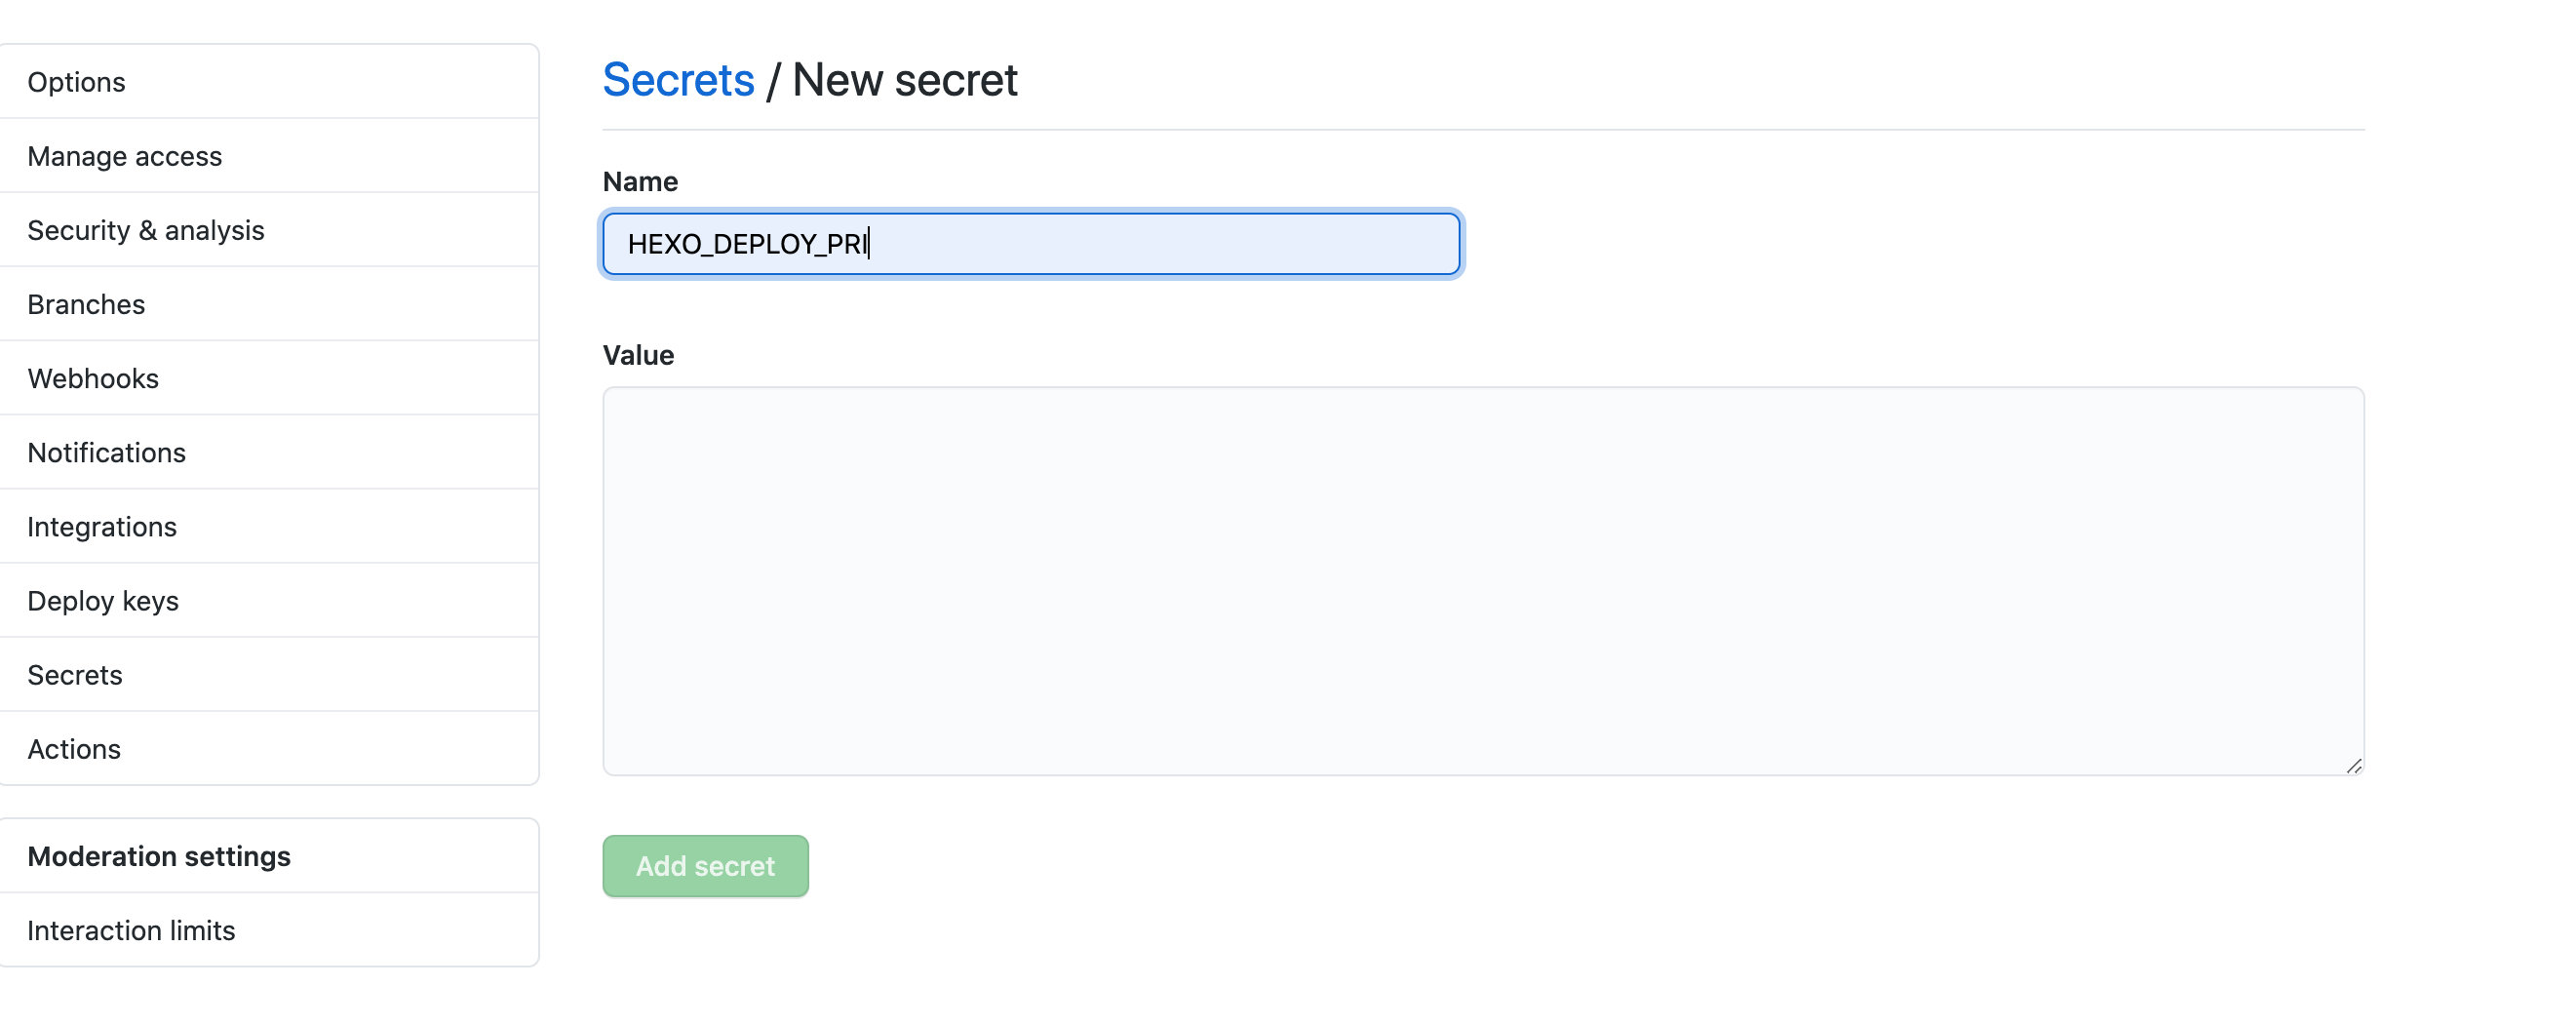
  • 添加仓库变量

    • 设置HEXO_DEPLOY_PRI, value 是上步生成的 BLOG_DEPLOY_TOKEN 的值
      pri
  • 添加 workflow, 文件路径为root/.github/workflows/deploy.yml

    1
    2
    3
    4
    5
    6
    7
    8
    9
    10
    11
    12
    13
    14
    15
    16
    17
    18
    19
    20
    21
    22
    23
    24
    25
    26
    27
    28
    29
    30
    31
    32
    33
    34
    35
    36
    37
    38
    39
    40
    41
    42
    43
    44
    45
    46
    47
    48
    49
    50
    51
    52
    53
    54
    55
    56
    57
    58
    59
    60
    61
    62
    63
    64
    65
    66
    67
    68
    69
    70
    71
    72

    name: CI

    on:
    push:
    branches:
    - master

    env:
    GIT_USER: ghyghoo8
    GIT_EMAIL: ghyghoo8@qq.com
    THEME_REPO: theme-next/hexo-theme-next
    THEME_BRANCH: master
    DEPLOY_REPO: ghyghoo8/ghyghoo8.github.com
    DEPLOY_BRANCH: master

    jobs:
    build:
    name: Build on node ${{ matrix.node_version }} and ${{ matrix.os }}
    runs-on: ubuntu-latest
    strategy:
    matrix:
    os: [ubuntu-latest]
    node_version: [14.x]

    steps:
    - name: Checkout
    uses: actions/checkout@v2

    - name: Checkout theme repo
    uses: actions/checkout@v2
    with:
    repository: ${{ env.THEME_REPO }}
    ref: ${{ env.THEME_BRANCH }}
    path: themes/next

    - name: Checkout deploy repo
    uses: actions/checkout@v2
    with:
    repository: ${{ env.DEPLOY_REPO }}
    ref: ${{ env.DEPLOY_BRANCH }}
    path: .deploy_git

    - name: Use Node.js ${{ matrix.node_version }}
    uses: actions/setup-node@v1
    with:
    node-version: ${{ matrix.node_version }}

    - name: Configuration environment
    env:
    HEXO_DEPLOY_PRI: ${{secrets.HEXO_DEPLOY_PRI}}
    run: |
    sudo timedatectl set-timezone "Asia/Shanghai"
    mkdir -p ~/.ssh/
    echo "$HEXO_DEPLOY_PRI" > ~/.ssh/id_rsa
    chmod 600 ~/.ssh/id_rsa
    ssh-keyscan github.com >> ~/.ssh/known_hosts
    git config --global user.name $GIT_USER
    git config --global user.email $GIT_EMAIL
    cp _config.theme.yml themes/next/_config.yml

    - name: Install dependencies
    run: |
    npm install

    - name: Deploy hexo
    env:
    GITHUB_TOKEN: ${{secrets.HEXO_DEPLOY_PRI}}
    run: |
    rm -rf .deploy_git
    npm run deploy

  • _config.yml文件配置下新增配置,支持github自动部署

    1
    2
    3
    4
    5
    6
    7
    8
    9
    10
    # Deployment
    ## Docs: https://hexo.io/docs/one-command-deployment
    deploy:
    type: git
    repo:
    github:
    url: https://github.com/ghyghoo8/ghyghoo8.github.com.git
    branch: gh-pages
    token: $GITHUB_TOKEN

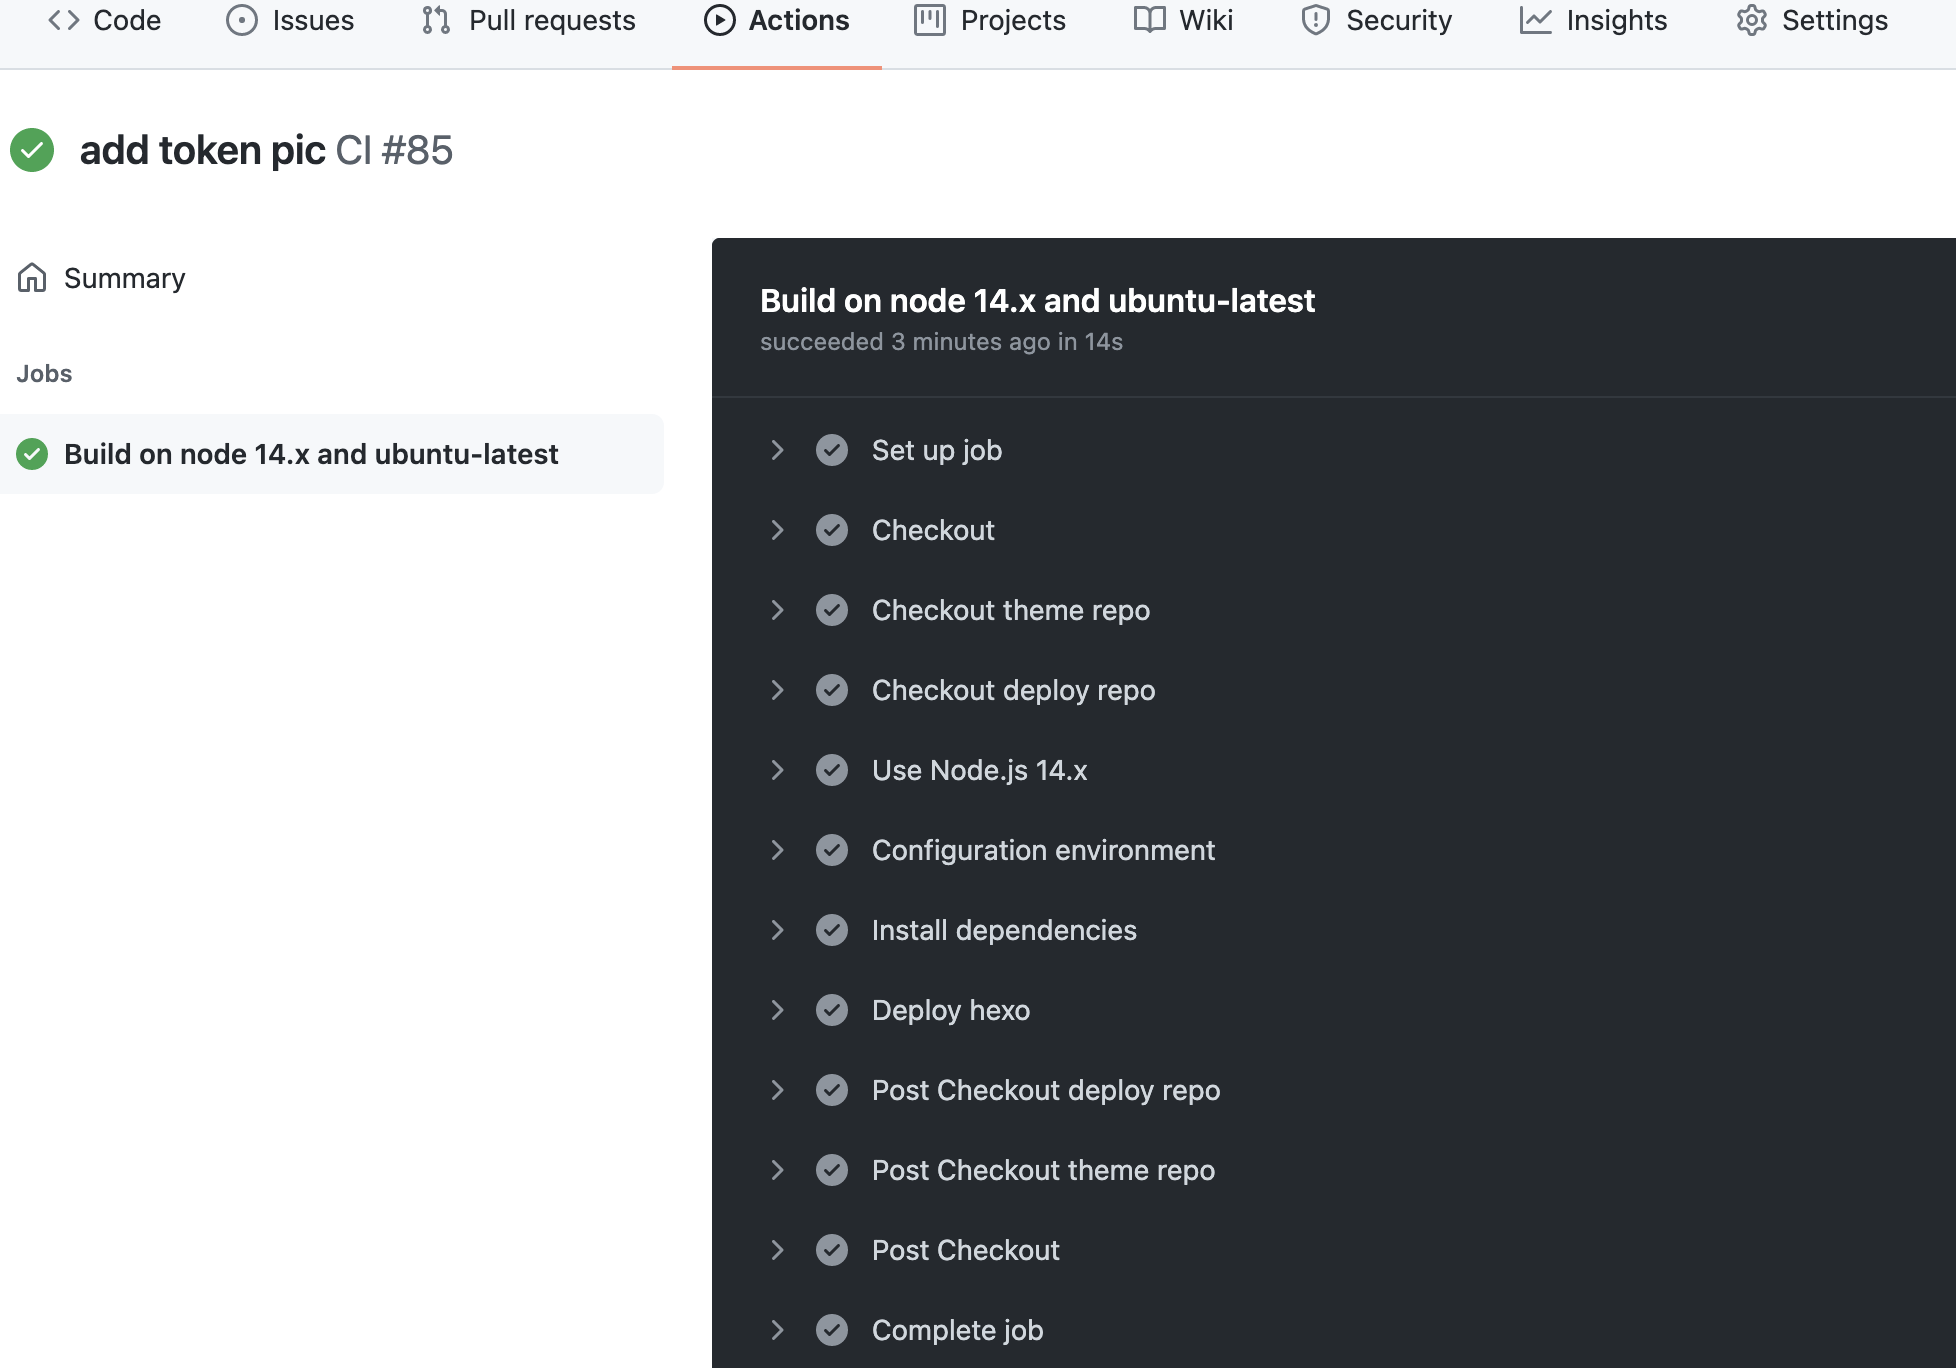
  • 提交到github后,就能触发仓库Actions
    ci

参考

Domain-Driven Design,DDD

我理解,DDD非常适合应用于偏业务的中大型复杂项目迭代中,尤其是电商之类的web项目。基于业务架构的系统设计,再完美匹配微服务架构,可以达到业务维度的高度统一。

我的学习沉淀

领域驱动设计

  1. 实例: 领域模型(抽象逻辑) :抽象/封装 数据+行为
  2. 方法:分治、抽象、知识(DDD提供了这样的知识手段,让我们知道如何抽象出限界上下文以及如何去分治)
  3. 限界上下文—>微服务边界划分,从业务维度做分治。上下文是领域的解系统,映射到团队,高效协作
    • 核心上下文
    • 支撑上下文
    • 通用上下文
  4. 防腐层ACL,适配&提供访问机制。
  5. 耦合程度控制在数据耦合层(数据库)

核心诉求:将业务架构映射到系统架构,想呼应。

微服务,则追求业务层面的复用

系统结构与组织结构 对齐,保持一致。

战术设计:数据+行为

  1. 实体 Entity (标识区分(唯一)的对象),有状态
  2. 值对象 Value Object (值描述的对象,不唯一)
  3. 聚合根 Aggregate,Aggregate Root,根实体
  4. 领域服务:Service,领域抽象功能点的实现。serverless处理流程,无状态
  5. 领域事件:通常是用来与其他聚合解耦的,采用观察者模式,一个聚合订阅另外一个聚合的事件。
  6. 库Repository:持久聚合,redis
  7. 工厂:创建聚合根 or 实体 or 值对象
  8. 模块:命名空间,概念隔离

在前端的业务域-如何实践DDD?

挖个坑

关于接入Sentry后,不影响chunk的hash值的解决方案

  1. Sentry.init({ release: window.__SENTRY_RELEASE__ }) 将release变量注入到入口html(entry)的window对象上
  • HtmlWebpackPlugin的配置中加入代码:
    • sentry_release_by_commit_id:’
  • 入口html(index.html)页头加入代码:
    • <%= sentry_release_by_commit_id %>
  1. package.json中加入命令:
  • “sentry-cli”:”VERSION=$(sentry-cli releases propose-version) && sentry-cli releases files $VERSION upload-sourcemaps –url-prefix ‘<your static cdn url prefix, like //xxx.com/dist/js >’”
  • propose-version命令的作用,使用sentry-cli建议的version值(默认取commit-id)

Rust是什么?

Rust 是一种兼顾内存安全高并发稳定运行的编程语言。它有着惊人的运行速度(有些领域甚至超过 C/C++),能够防止运行错误,并保证线程安全。RUST 语言使每个人都能够构建可靠、高效的软件。

不足之处

  1. 学习门槛
  2. 编译成本(RAII, Resource Acquisition Is Initialization 资源获取即初始化)

Node的一些优缺点

  • 优点
    • 异步/高并发,promise、迭代器
    • 函数式,react
    • 包管理,npm
    • 事件模型,epoll
    • 门槛低/易上手,javascript
  • 缺点
    • 匿名函数、容错性
    • 单进程(易阻塞)
    • 性能(CPU密集)

node的一些应用场景

  • RUSTful / Graphql API
  • SSR
  • Electron
  • websocket

如何去拓展Node的能力&应用场景?

Node Addons 🍾

适合写Node(V8 + libuv) Addons的语言👇

  • C++(node-gyp)
  • Rust
  • golang

🌰

用node实现一个文件监听功能

1
2
3
4
5
6
7
8
9
10
11
12
13
14
15
16
17
18
19
20
21
22
23
24
25
const Koa = require('koa');
const app = new Koa();
const chokidar = require('chokidar');
const PORT = 3000
const watch_history = ['👇record static/* files change history👇']
const ICON_EMUN = {
'add': '📃',
'addDir': '📂',
'unlink': '❌',
'change':'🌋'
}
app.use(async ctx => {
ctx.body = `<table width=900 ><tbody>${
watch_history.map(rec=>`<tr>${rec}</tr>`).join('')
}</tbody></table>`
});
chokidar.watch('./static').on('all', (event, path) => {
if (['add', 'change'].includes(event)) {
watch_history.push(`<td>${ICON_EMUN[event]||'🧐'}</td><td>${event}</td><td>${path}</td><td>time:${new Date().toLocaleString()}</td>`);
}
console.log(event, path);
});
console.log(`server run===> http://localhost:${PORT}`)
app.listen(PORT);

用Rust实现一个文件监听功能

file.rs 文件内容👇

1
2
3
4
5
6
7
8
9
10
11
12
13
14
15
16
17
18
19
20
21
22
23
24
25
26
27
28
29
30
31
32
33
34
35
36
37
38
39
40
41
42
43
44
45
46
47
48
49
50
51
52
53
54
55
56
57
58
59
60
61
62
63
64
65
66
67
68
69
70
71
72
73
74
75
76
77
78
79
80
81
82
83
84
85
86
87
88
89
90
91
92
93
94
95
96
97
98
99
100
101
102
103
104
105
#![allow(non_snake_case)]
use super::WatcherTrait;
use notify::{DebouncedEvent, RecommendedWatcher, RecursiveMode, Watcher};
use std::fs;
use std::path::Path;
use std::path::PathBuf;
use std::sync::mpsc;
use std::sync::Arc;
use std::sync::Mutex;
use std::thread;
use std::time::Duration;

/// 文件同步器
pub struct FileWatcher {
/// 文件路径
path: PathBuf,
/// 文件内容
pub content: Arc<Mutex<String>>,
/// 内容版本,初始化为1,文件一次修改累计1
pub version: Arc<Mutex<usize>>,
}

impl FileWatcher {
/// 创建新的同步器
pub fn New(path: &Path) -> Self {
if path.exists() {
let file_content = fs::read_to_string(path).unwrap();
let content = Arc::new(Mutex::new(file_content));
let version = Arc::new(Mutex::new(1));
Self {
path: PathBuf::from(path),
content,
version,
}
} else {
error!("watch an nonexist file!");
panic!("watch an nonexist file!");
}
}
}

impl WatcherTrait for FileWatcher {
/// 新线程启动观察器
fn watch(&mut self) {
let path = fs::canonicalize(&self.path).unwrap();
let content_guard = self.content.clone();
let version_guard = self.version.clone();
thread::spawn(move || {
let (tx1, rx1) = mpsc::channel();
let mut watcher: RecommendedWatcher =
Watcher::new(tx1, Duration::from_secs(1)).unwrap();
watcher
.watch(path.parent().unwrap(), RecursiveMode::NonRecursive)
.unwrap();

// loop监听,匹配 file event
loop {
match rx1.recv() {
// 文件写入,创建
Ok(event) => {
info!("watch event: {:?}", event);
match event {
DebouncedEvent::Remove(p)
| DebouncedEvent::Write(p)
| DebouncedEvent::Create(p) => {
if path == p {
let mut content = content_guard.lock().unwrap();
let mut version = version_guard.lock().unwrap();
(*version) += 1;
match fs::read_to_string(&p) {
Ok(c) => {
*content = c;
info!("wrote file: {:?} #{}", p, *version);
}
Err(_) => warn!("file not exist: {:?}", &p),
}
}
}
_ => {}
}
}
Err(e) => {
error!("watch error: {:?}", e);
}
}
}
});
}

/// 文件内容
fn content(&self) -> String {
let content_guard = self.content.clone();
let content = content_guard.lock().unwrap();
(*content).clone()
}

/// 文件更新次数
fn version(&self) -> usize {
let version_guard = self.version.clone();
let version = version_guard.lock().unwrap();
*version
}
}


使用Rust-FFI 暴露外部接口给Node调用

⚒️ 脚手架&工具集,帮助你快速地将 node与rust 绑定(Rust bindings)

  • neon
  • node-rs
编译出native文件,即可被node引用
1
2
3
4
5
6
7
8
9
10
11
12
13
14
15
16
17
18
19
20
21
22
23
24
25
26
27
28
29
30
31
32
33
34
35
36
37
38
39
40
41
42
43
44
45
46
47
48
49
50
51
52
53
54
55
56

const Koa = require('koa');
const app = new Koa();
const chokidar = require('chokidar');
const fs = require('fs');
const nativeTools = require('./lib/fw/native');
const PORT = 3001
const watch_history = [`native-->hello方法输出:${nativeTools.hello()}`,'👇record static/* files change history👇']
const ICON_EMUN = {
'add': '📃',
'addDir': '📂',
'unlink': '❌',
'change':'🌋'
}

const BASE_PATH = './static'

const filesCache = {}; // 缓存file watcher Map
app.use(async (ctx, next) => {
const files = fs.readdirSync(BASE_PATH)
files.map(f => {
const _path = `${BASE_PATH}/${f}`;
let type = false;
let d = filesCache[_path];
if (d) { // 已缓存,则直接拿 watcher
if (d.version < d.watcher.version()) {
d.version = d.watcher.version()
type = 'change';
}
} else {
const wathcer = new nativeTools.NodeFileWatcher(_path);
d = {
path: _path,
watcher: wathcer,
version: wathcer.version()
}
filesCache[_path] = d; // 缓存 watcher
type = 'add';
}
// 有变更,则增加渲染数据===>
type && watch_history.push(`<td>${ICON_EMUN[type]}</td><td>${type}</td><td>${_path}</td><td>${d.version}</td>`)
})
await next();
})


app.use(async ctx => {
ctx.body = `<table width=900 ><tbody>${
watch_history.map(rec=>`<tr>${rec}</tr>`).join('')
}</tbody></table>`
});


console.log(`server run===> http://localhost:${PORT}`)
app.listen(PORT);

neon简单教程

  • npm install neon-cli —global
  • neon new <projectname>
  • root—-> neon build
  • 生成 native/index.node——> const nativeTools = require(‘./lib/fw/native’);

创建的项目<projectname>目录结构:

  • lib
    • index.js
  • native
    • build.rs
    • Cargo.toml
    • src
      • lib.rs
    • package.json

native/src/lib.rs👇

1
2
3
4
5
6
7
8
9
10
11
12
13
14
15
16
17
18
19
20
21
extern crate neon;

#[macro_use]//可以使用 info! 的log宏,打印log===>
extern crate log;

mod sync;
use sync::JsFileWatcher;

use neon::prelude::*;

fn hello(mut cx: FunctionContext) -> JsResult<JsString> {
Ok(cx.string("hello neon"))
}

// 注册导出 & binding
register_module!(mut cx, {
// 导出一个方法
cx.export_function("hello", hello);
// 导出一个class
cx.export_class::<JsFileWatcher>("NodeFileWatcher")
});

Rust在大前端领域,还能做什么?

  • swc(高性能>babel)
  • 监控(v8、system…)
  • 跨端(by FFI)
    • wasm
    • so
    • dll

学习资料

test

建个blog

logo